
Note: This option is available only if you are logged in as an Organization Administrator or playing an Organization Administrator Role. (Please see The Org Admin Role for more information.)
In an Organization, Users can be Persons or Roles.
You can add more Persons in your Organization account so that multiple Persons in your Organization can use the system. You can assign Roles to these Persons to institutionalize processes in your Organization.
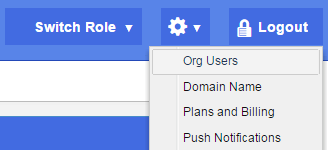
Click on the Settings icon available at the top right side in the header. Select Org Users option as below.
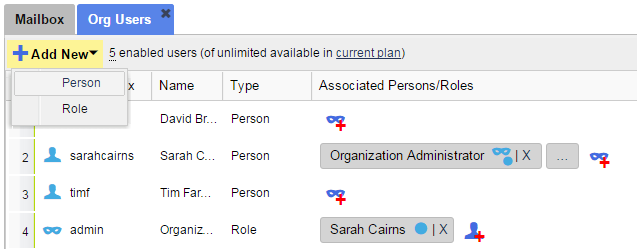
The Org Users tab appears. Click on Add New down arrow. Select Person option as below.
The Create new Person window appears.
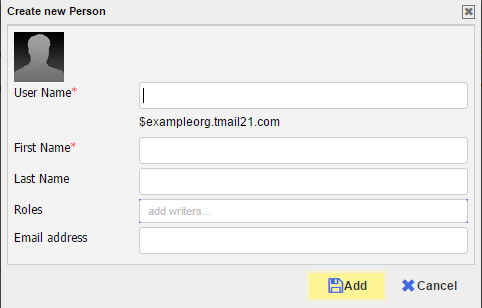
You need to add the following details for a new Person.
Basic Details
Add the following basic details for the new Person.
- User Prefix: The TMail User Prefix for this new Person. When combined with the domain of your organization, this will define the User Name or Address of the Person. Note that the User Prefix is case insensitive so that jsmith, JSMITH, JSmith etc. are all the same Person. The convention is to use all lower case for the User Prefix, i.e. jsmith.
- First Name: The First Name of the Person
- Last Name: The Last Name of the Person
- Roles: You can assign different Roles for the Person. (Please see Add New Role for detailed instructions.) As you start entering the name of a Role, the Role names available in this account auto-complete.
Email Address
Enter the email address to associate with the user account for the Person. The Person needs to verify this email address at a later time. You or the Person can change it later, if required. Note that if you change this email address anytime, either the Person will need to verify the new email address again. (Please see Verify Email Address for more details.)
Note: You can add a new Person without specifying the email address. In this case, the new Person can continue using the new TMail21 account without an associated email address; however, some features may not be available such as the option to reset the password or to receive email notifications. See more details in Without Specifying Email Address, later in this article below. (Please see Verified and Requested Email Addresses for more details.)
Click on Add button. The new Person is added to the list of Users with type Person. If you associated an email address with the Person, you will see this in the Requested Email column. The system sends an email at the this email address. Once the email account owner verifies the email address (by clicking on a link in the email), the email address moves from Requested Email column to Verified Email column.

Using an Associated Email Address
While adding details for the new Person, if you use such an email address that is already associated with another TMail21 account, you see the following message.

Select Yes, to add a new Person and associate the TMail account with this Email address. In this case, the owner of that email address gets following three emails:
A Welcome Email: TMail21 sends a welcome email to notify that the Administrator Role has created a new TMail account. The Email text contains the TMail address and a link to help the email account owner to setup the Password and then Login.
Account Verification Email: Once the Person logs in, TMail21 sends an EMail to allow the Person to verify the email address for this new TMail account.
Account Association Alert Email: Once the Person verifies the new TMail account, TMail21 sends an Email with a warning or alert message that the earlier TMail21 account has been disassociated from this email address.
If you do not want to Force Create this new account with this Email address, click on No on the Force Create dialog box. Enter another Email address to continue or create the Person with no associated email address.
Without Specifying Email Address
If you do not enter an email address in the Email Address field, TMail21 generates a unique URL that you can share with that new Person privately, as below.
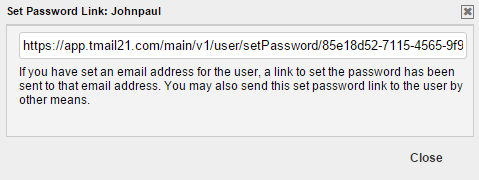
Copy this URL and share it with the new Person outside TMail21, such as by other email services or IM. In this case, the Person can click on that URL to go to the page where the user can set the password for the new account.
This Person can continue using the account without an associated email address; however, some features may not be available such as the option to reset their password or to receive email notifications.
Instructions for the New Person
Once you create the Person account, the Person receives an email that you have created a new TMail account for them. This Person can click on Click here button to set the password of this new account. Once the password is successfully specified, the Person is logged in and can start using TMail.
Next Step
When you add a new Person, the next step is for them to verify the associated email address. (Please see Verify Email Address for more details.)
Billing Implications
If you add a User to your Organization and you are on a paid plan, then this user will be billed in a pro-rated fashion for the current billing cycle. For example if you are on a paid plan with a Monthly billing cycle and you add a user on the 20th of the Month. You will be billed for this user from the 20th of the month to the end of this monthly billing cycle.

