
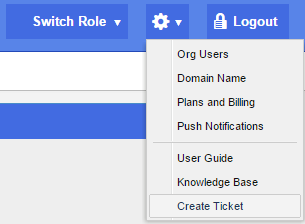
You can create a Support Ticket if you have any questions while the system. Click on the Settings icon available at the top right side in the header. Select Create Ticket option as below.
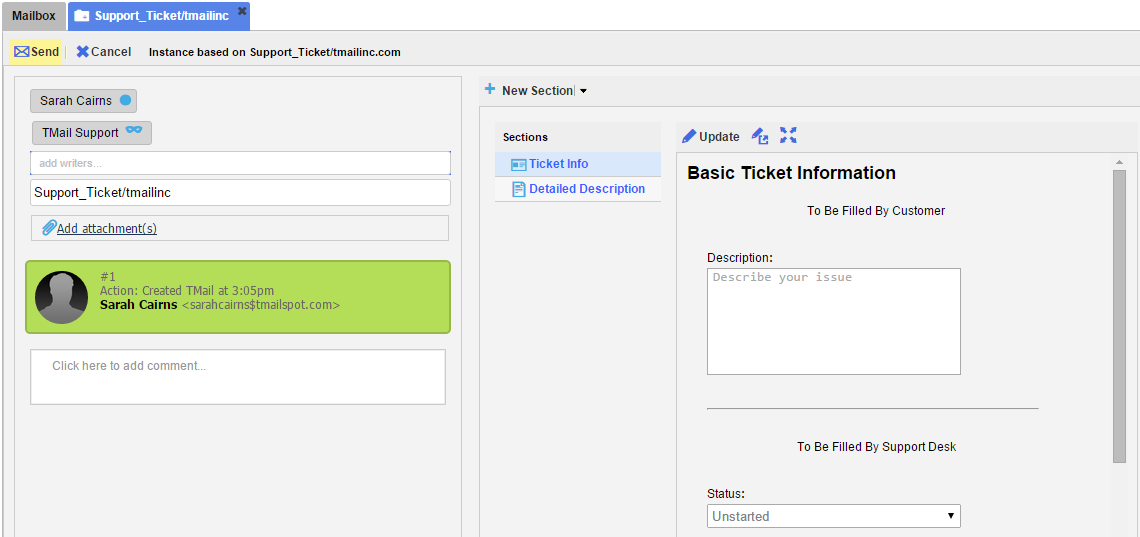
The Support Ticket interface opens in a new tab, as below.
Basic Details
Writers
You can see that the TMail Support user (support$tmailinc.com) is automatically added as one of the Writers for this Support Ticket. You can add more Writers, if required. (Please see Add Writers for more details.)
Subject
The Subject is automatically generated as “Support Ticket: “. You can change it, as required. A common pattern would be to modify it to “Support Ticket: I am having problem XYZ”.
Attachments
If you would like to add any attachments to your support ticket, Click on the Add attachments link. Select the documents that you want to attach with this Support Ticket. For any Attachment that you attach, you can see its name and size.

Click on the corresponding Remove option to remove it from Attachments.
Ticket Details
In the right side area, you can see that two Sections are automatically created by the system.
Ticket Info
A Form Section is automatically created, with name Ticket Info. You can see the corresponding Form fields where you can add the Ticket details.
Use an Update option from the small toolbar, to fill the details for the Ticket. For example, if you click on the Update link in the toolbar, the Form opens in the same tab, as below.
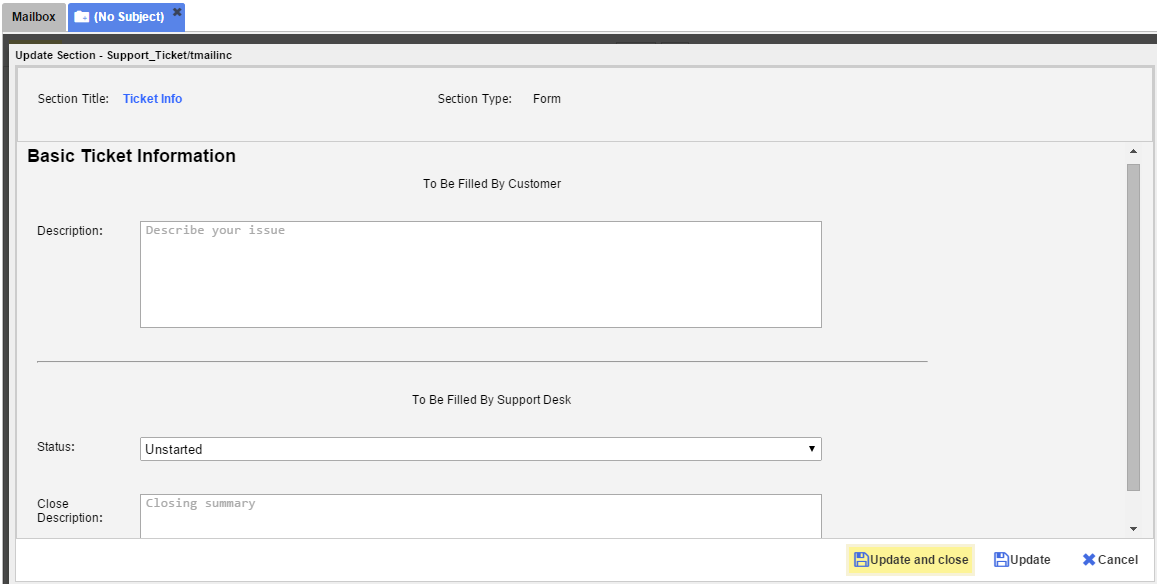
The Section Title is Ticket Info and you cannot change it. In Basic Ticket Information area, write the detailed description of the issue or your question for the support team.
Click on Update button to save the changes if you want to continue adding more details. Click on Update and Close button to save the changes and to close the tab. Click on Cancel button to discard the Support Ticket details and to close the tab.
Detailed Description
You can see a Detailed Description Section where you can add more details about the Support Ticket. Click on the Update option available in the small toolbar and add required details.
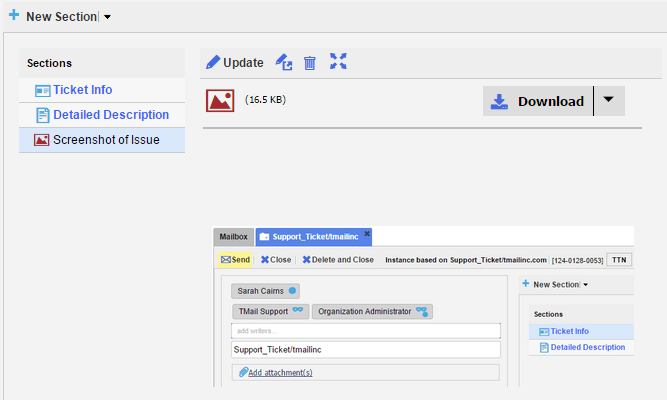
Create New Section
You can also create more Sections in support of your Ticket. For example, you can create a File Section to attach an image, as below. (Please see Create New Section for detailed instructions on how to create new Sections.)
Actions
After you add required details for the Support Ticket, you have following options.
- Send: Select this option to send the Support Ticket.
- Close: Select this option to close the Support Ticket. The Ticket is saved in Drafts folder. (Please see The Drafts Folder for detailed instructions on how you can send a Ticket from that folder.)
- Delete and Close: Select this option to discard the Support Ticket. It is not saved anywhere for your latest reference.
Note: A Support Ticket is a TMail Template of type Support_Ticket/tmailinc.com. When you create a Support Ticket you are actually creating an Instance (TMail) of this Template. See Templates and Instances for more information on Templates and Instances.

